Pages

Saturday, March 17, 2012

China Glaze Riveting from the "Colours from the Capitol" Hunger Games Collection!

      Is anyone eagerly anticipating the big premier of the Hunger Games movie this weekend? I am!! I read all of the books last summer and was ecstatic to find out there was a movie coming out this year. I can't wait to go see the movie this weekend with my husband! I hope the movie does the book justice, and it will be exciting to see the story on the big screen.
     Anyway, of course I had to pick up some polishes from the China Glaze "Colours from the Capitol" collection, and the first one I am going to show you is Riveting. Thanks to my mom for modeling this polish!
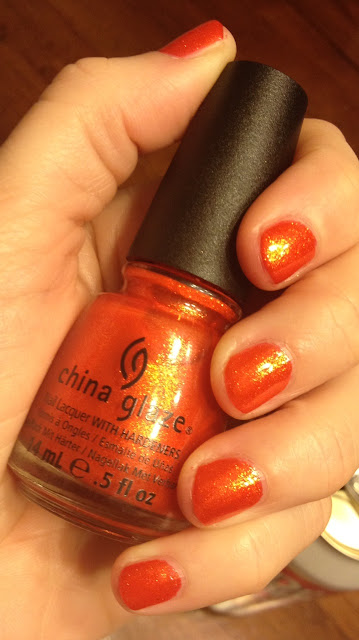
     Riveting is one of the most gorgeous orange polishes I have ever seen. Riveting represents District 3, The Technology District from the nation of Panem in the Hunger Games. Although this color is supposed to represent Technology, it reminds me more of Katniss Everdeen, who is the trilogy's heroine and the "Girl on Fire."
     Riveting is a fiery orange with prominent golden shimmer laced throughout its two coat formula. I've read on some nail blogs that the formula was very thin and required multiple coats to reach opacity, but I didn't have any problem with this polish. It was perfectly opaque and shimmery with just two coats. Riveting is very versatile because it is a great, bright, summer, tangerine orange, but it is also a warm, fall, pumpkin orange. I love it! The light in the pictures below catches the golden shimmer beautifully.

Look at the beautiful golden shimmer!


What do you think about Riveting? Have you read the Hunger Games, and are you excited to see the movie?

Saturday, March 10, 2012

St. Patrick's Day Mani #2: Irish Tuxedo

     How is everyone's weekend so far? My weekend is off to a great start, I spent the morning with my husband before he went to work, and tonight I am going shopping with my mom.
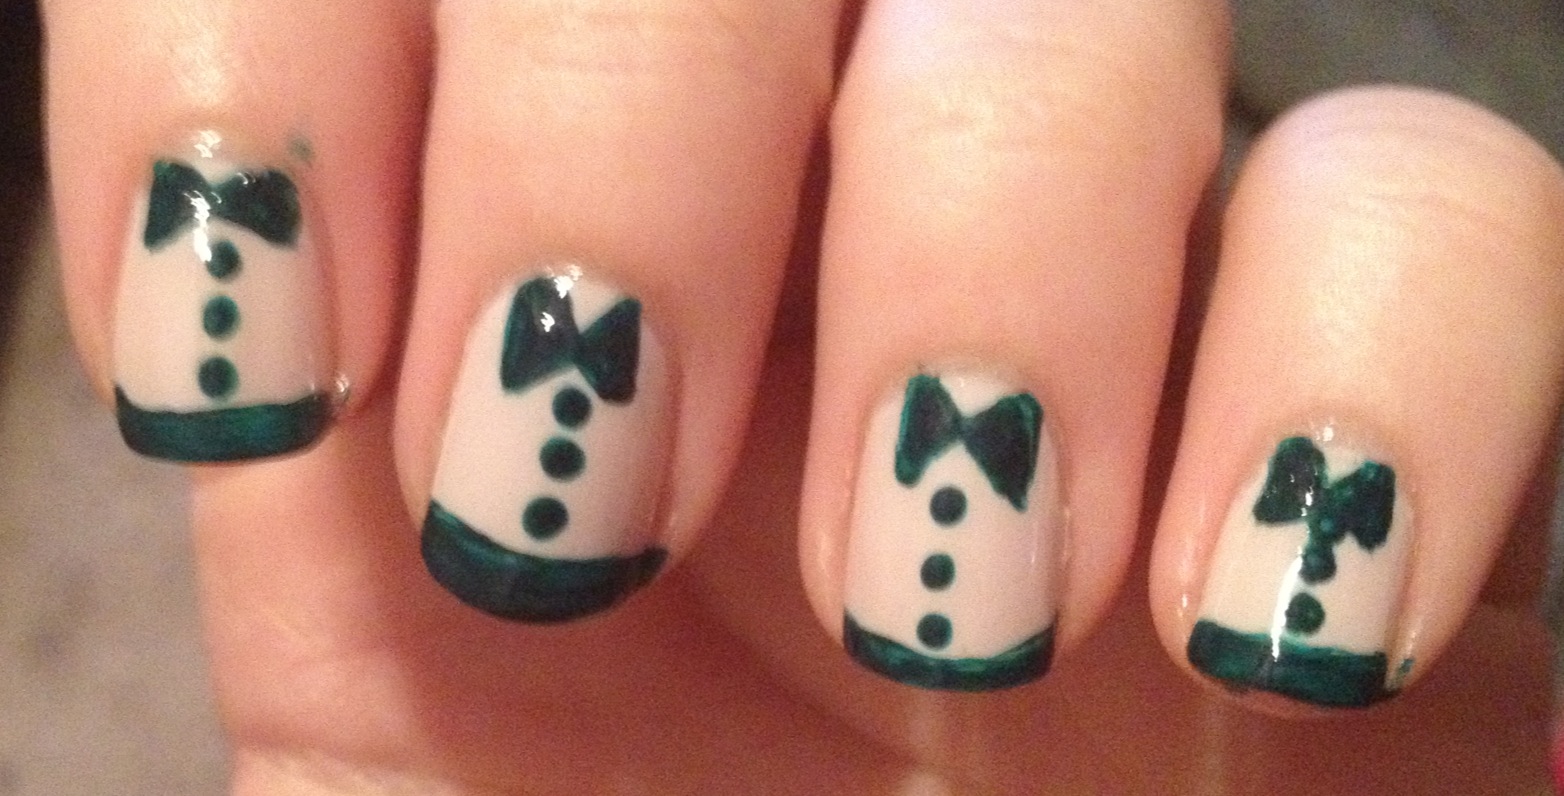
     Today I am going to show you another St. Patrick's Day manicure called the Irish Tuxedo. I did a black and white tuxedo pedicure a few weeks ago here. I've been wanting to do a tuxedo manicure for a while now, so I decided to do a green one for SPD.
     First, I used one coat of Get A Clue and one coat of Incognito from Color Club's Alter Ego Collection. I used one coat of each color to try and get a nude color for my base, but it ended up being more pink than nude. In the end, though, I liked how the green and pink looked together.
     I then used green acrylic paint to paint the bow ties and tips, and then I used my dotting tool from Sephora to make the buttons. The acrylic paint keep peeling off of my tips, so I put a coat of Revlon Emerald City over the paint on my tips to make the manicure last longer. I then topped everything off with a coat of Poshe.


 The picture below was right after I was finished, before I cleaned the paint from my skin around the nails. 

     Overall, I really really liked this manicure. The hardest part was making a straight line for my tips. This manicure is a somewhat toned down SPD manicure, but I just love how the green looked! I'm calling this the Irish Tuxedo manicure! 
     What do you think? Have you every tried a tuxedo manicure?

Wednesday, March 7, 2012

St. Patrick's Day Mani #1: San Francisco Splatter!

     Who out there is ready for the weekend already?? ME!! Does anyone have any fun plans this weekend? My niece's birthday was earlier this week, so my husband and I are going to her birthday party Sunday, so I'm excited about that.
     So, if anyone has been reading the Mermaid Nails Facebook page, you will notice that I am featuring St. Patrick Day manicures from now until March 17th, which is St. Patty's Day, and if I have more that I didn't get to post before that day, I definitely will be posting them after, as well. However, I thought it would be fun to see your SPD manicures, too! So, I would love for you to post your manicure on the Mermaid Nails Facebook wall, and I will feature them all on a special SPD blog post! Can't wait to see them!
   
     Now, onto the first SPD manicure that I am going to show you...

     I've wanted to do a splatter manicure ever since I saw it on The PolishAholic's blog here. Basically, what you do, is tape off the skin surrounding your nail, and then put some nail polish onto a paper plate, dip a straw into it, and blow through the straw to get the polish to spray over your nail, so as to get the splatter effect. You then take the take off of your skin, and do the next nail. So, after wearing Sinful Colors Olympia for a day, which I will later review, I decided to "splatter" it with Sinful Colors San Francisco.
     Olympia is an avocado green cream, and San Francisco is a hunter green shimmer. I think they look lovely together:


     The shimmer in San Francisco contrasts so nicely with the cream of Olympia. 

     The biggest problem I had with doing the splatter manicure was that I couldn't get enough polish to pick up on a straw if the polish was just dabbed on the plate. I actually just had to stick the straw down into the polish bottle, blew through the straw once to get the big clumps off, and then blew the rest onto the nail. 
     I definitely would recommend using a cheaper nail polish, like Sinful Colors or Wet N Wild, because this technique wastes a lot of polish. I was surprised at how much it did waste and look at the mess I was left with when I was finished:


     However, I love the result, and I think it looks very Irish! ☺


     What will you be wearing on your nails for St. Patrick's Day? Will you be doing the splatter? 


Monday, March 5, 2012

Sinful Colors Neptune

     Boy, I need a vacation. Somewhere away from work, and laundry, and schedules, and cleaning, and sleepiness! My husband and I definitely, definitely need a weekend away together somewhere ASAP!
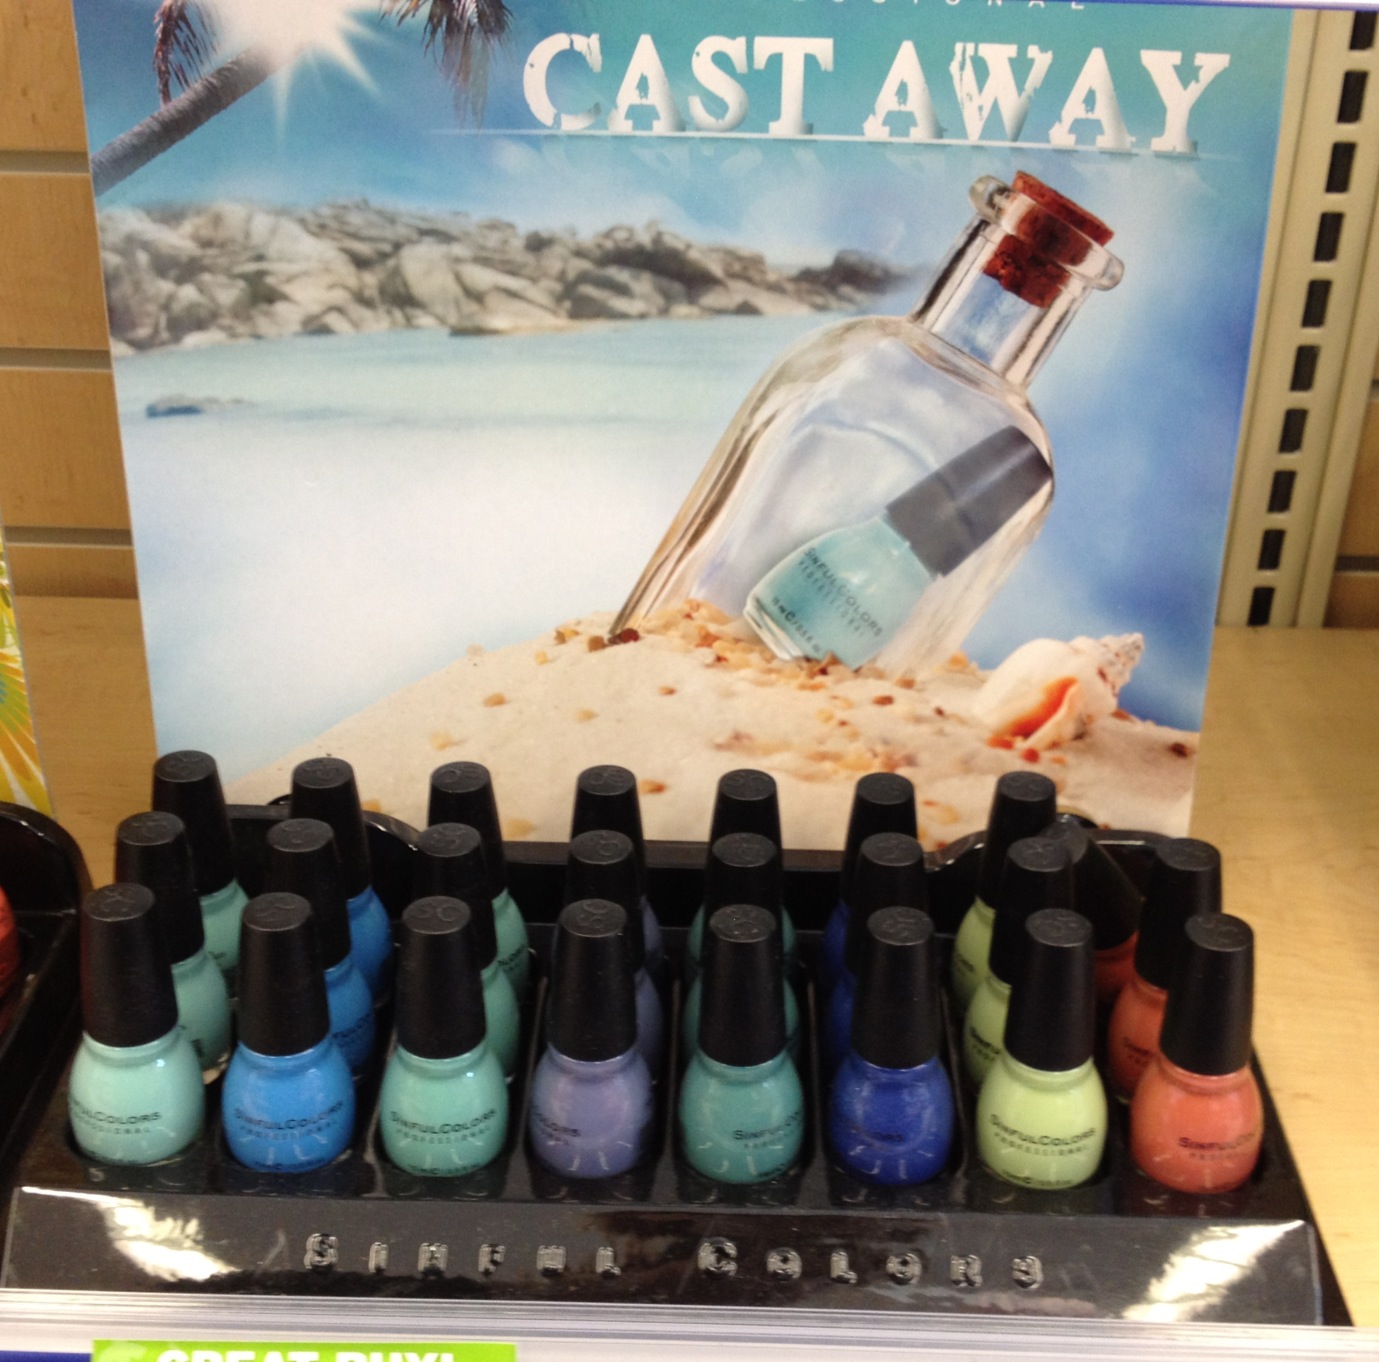
     So, imagine, what I thought when I walked into Walgreens and saw this beautiful, serene, and breezy display of a new Sinful Colors collection:


     Does that background photo not just make you want to pack up your things and fly away to an all-inclusive resort with crystal-clear turquoise water and around-the-clock couples massages?? *Sigh* 
     Instead, I settled for this:


     At least I can close my eyes and dream (and smell this tropical candle, of course). LOL

     But, I did bring a couple of those gorgeous polishes home with me, and Neptune was one of them.

     Neptune is a dark, denim blue with silver shimmer. I used two coats in the photos below. At first, the application was fine. When I was applying the second coat, the polish seemed to become a little "goopy." You can also see tip-wear in the photos below, and this was less than 24 hours after application. I don't know if the tip-wear is from the polish, or from the new Poshe top coat I'm trying out. 
     However, I love this color. It's very different from the colors I've been wearing lately, and it's a nice blue without being too loud. And, for $1.99, you can't really go wrong! 
     Check out the photos below! Oh, and I added a coat of China Glaze Luxe and Lush on my accent nail because I got it in the mail today, and I just couldn't resist. ☺


     What do you think? Are cool, blue waters and sand calling your name, or just the polish? ;)

Sunday, March 4, 2012

Jelly Sandwich with Milani Neon Techno Red and OPI Rainbow Connection!

     I know I've talked some on here about jelly sandwiches, but I'm not sure if I've ever posted one for you guys. So, I decided to do a jelly sandwich last night to show you today! A few weeks ago I was in CVS and some Milani nail polish was on clearance for around $1, so I brought Milani Neon Techno Red home with me. I knew that Milani's Neon nail polish line had a jelly formula based on swatches I had previously seen online, and I think jellies are so fun in the summer. What a "jelly" formula is, is when the polish is sheer, but when you apply a few coats, it looks kind of like rock candy, and you can still see through it. A jelly sandwich is when you layer something in between coats of a jelly polish, like glitter. This way, the glitter is not a "top coat," but it is kind of "floating" inside the jelly polish. LOL I hope I explained that well. ☺
     Anyway, one thing I should say is that this Milani "Neon" was not neon at all. It isn't an eye-searing color by any means, just a juicy, summer, watermelon-esque color. So, it is strange that it has the word "Neon" in bold letters on the bottle.
     I painted one coat of Techo Red first, and then I used about three coats of OPI Rainbow Connection, and then one more coat of Techo Red to top it off. I was really disappointed in the fact that I had to use three coats of Rainbow Connection to get a sufficient amount of glitter on the nail. I don't know if I got a bad bottle of it, but it was very watery. I then used Konad Special Polish in White to stamp the star on my accent nail with Bundle Monster Plate BM05. Lastly, I used fast-drying top coat Poshe to seal the deal. Here is what I finished with:


     So, what do you think? Have you ever experimented with jelly sandwiches??

Saturday, March 3, 2012

China Glaze Magnetix Cling On

     Magnetic nail polish has been really popular this year, and many brands have released their own magnetic nail polish line. Cling On is a part of the China Glaze Magnetix collection, and it is a shimmery olive green. Unlike the Icing Magnetix collection, where the magnet was located on the top of the brush cap, the magnet for the China Glaze polish you have to buy separately, and the magnet has three different designs. I will update this post with some pictures of the magnet soon.
     The instructions are the same with the China Glaze magnetic polish as with the Icing magnetic polish I reviewed here. You just paint your nails with the polish and hold the magnet close enough to the nail to allow the design to appear, without letting the magnet touch the nail. I normally paint one coat first, and then paint a second coat, and then hold the magnet close to the nail.
     I really, really liked how Cling On turned out. A special thanks goes to my friend Amanda for letting me try out this polish on her nails. ☺ Cling On is such a gorgeous shade of green, and the magnetic design really comes out sharp, and looks unique.

With flash:
 I just love the look of this polish and design!
 I love the contrast from light to dark lines:

     You can find this collection at Sally Beauty Supply or Head2ToeBeauty.com. What do you think of Cling On? Do you like the magnetic nail polish trend?

Thursday, March 1, 2012

China Glaze Solar Power

     China Glaze Solar Power was originally released in the China Glaze Ecollection in 2008. I got lucky and found Solar Power at Sally Beauty Supply for $1.99 on clearance, so I decided to give it try. First, let me say that the application for this polish was horrible! The formula was very runny, and I ended up with uneven lines near my cuticles. Also, in the pictures below you will see some bumpiness and there is a bubble on my ring finger nail! What is up with that? This polish just may be old, since the collection was released four years ago.
     Besides the formula, Solar Power is a bright, mustard yellow with subtle shimmer. I know this, because when I asked my husband what he thought about my nails, he said, "They look mustard-y." ☺
     Solar Power is very bright and fun, and it definitely puts me in the mood for summer. However, I wish the formula was more user-friendly. Until I find a better yellow, this one will live in my stash. ☺


     What do you think? Do you like yellow nail polish?